The following suggestions can help you to practice reading in Japanese more efficiently. They assume that you are reading a PDF version of one of our four Japanese Readers on a computer screen. Generally speaking, we do not recommend that you practice reading the PDF files on smaller hand-held devices like phones and tablets because such devices do not facilitate the selection of a single kanji, and they do not permit multiple windows to be opened on the screen. If you are interested in reading the files on a touchscreen computer, as opposed to one requiring the use of a mouse and a keyboard, please see the information near the end of this page.
There is one exception to the above recommendation about devices on which you should use our PDF files. We do encourage you to use the PDF files in our PDF package titled Core Kanji when you want to identify mysterious kanji using an iPhone. Please see the discussion near the end of the Kanji ID page for more information.
Formatting of the Kanji Catalogue
Please be aware that the Kanji Catalogue is formatted to allow you to locate any kanji heading easily. (A “kanji heading” is the first portion of the section in the Kanji Catalogue that describes a particular kanji.) The formatting of the kanji headings is “XXXX. kanji” (notice the empty space between the period and the kanji). Of course, the word “kanji” here represents an actual kanji, such as 自.
For example, the heading for the kanji 自 is “0055. 自” (this occupies 7 spaces; again, notice the empty space after the period). If you click in the Kanji Catalogue window and open a Search box, you will be able to locate this kanji heading in one of two ways: either by typing “0055.” (this occupies 5 spaces) or by typing “. 自” (this occupies 3 spaces; think “dot space kanji“). In order to “type” a kanji your computer should be equipped with an IME (input method editor) that converts romaji typed on your keyboard to kanji on your screen. Alternatively, you can place a copied kanji in a Search box by pasting it, as described below.
With some software, including Adobe Acrobat DC, it may not be necessary to include the “space” when typing “dot space kanji” in a Search box. Typing “dot kanji” may be enough. Please experiment with your software to see if you need to use the space or not.
Reading Book 1 on a Computer Screen
- Download the free version of Adobe Acrobat Reader DC. (Note: when acquiring Acrobat Reader DC, be careful to uncheck all of the other options on the screen that might force you to install applications that you may not want.)
- Turn off the “Adobe New Experience,” if necessary. If you don’t do this, you may not be able to resize your windows properly and fit all of your windows into your screen. In Windows, click the hamburger menu (the three horizontal lines at the upper left corner) and choose “Disable New Acrobat.” In macOS, go to View > Disable new Acrobat.
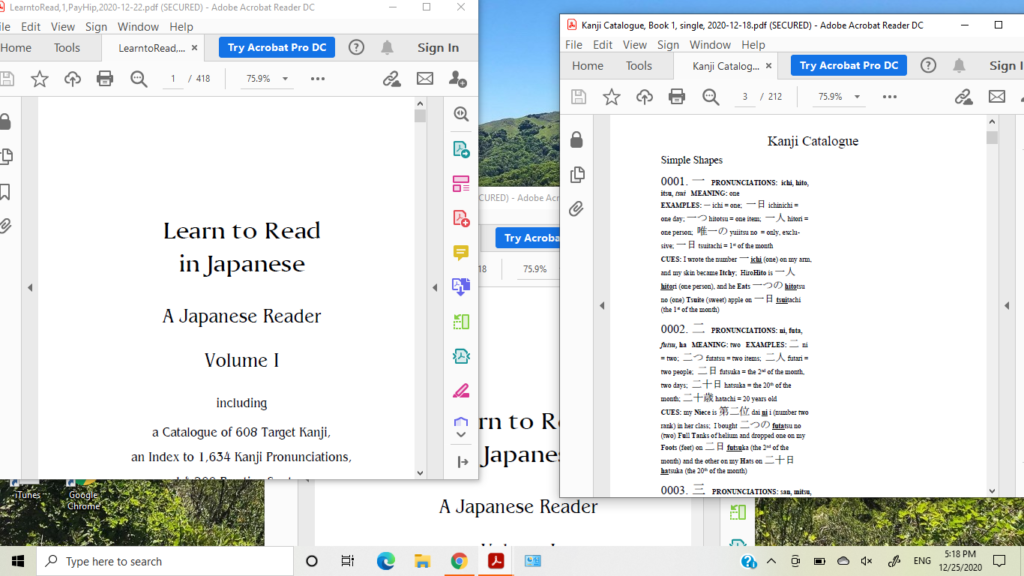
- Purchase the PDF files for Learn to Read in Japanese, Volume I. You will need both a Japanese Reader and a Kanji Catalogue.
- Duplicate the Japanese Reader PDF file by copying the file that you have purchased and pasting the copy into the same folder as the original. Your computer should assign the copied file a new name. For example, if the name of the file that you have copied is “Reader, book 1, Payhip, 2025-07-19.pdf,” you should now see a new file in the same folder named “Reader, book 1, Payhip, 2025-07-19.pdf – Copy.” You will now be able to open two versions of the file in Adobe Acrobat, one for reading Japanese text and the other for reading romaji and English text.
- Using Adobe Acrobat Reader DC, open at least three PDF files: a first copy of the Japanese Reader, a second copy of the Reader and a Kanji Catalogue. (You will probably find it convenient to make a copy of the Kanji Catalogue, as described for the Japanese Reader in the previous paragraph, and open this copy as a fourth PDF file. This will make it easy for you to compare different kanji side by side.)
- If the three files just described are not already in separate windows, separate them by clicking on their headings in Adobe Acrobat and dragging them onto the desktop outside of the Adobe Acrobat window. Your screen should now look something like this (in Windows 10).
- Set the text size to 125% in all windows, using the tool in the toolbar at the top of the windows. This advice is only relevant if you are using a 14-inch laptop, as suggested below. On a larger screen, it’s OK to use a larger text size.
- Turn off automatic resizing of windows. (If necessary. This only needs to be done once.) In Windows 10, click on the Windows button in the lower left corner of the screen. Then click Settings, System, Multi-tasking. Then turn “Snap Windows” off. This will prevent windows from automatically expanding to full screen if you move them partially off the border of the screen.
- Adjust the size of your windows. Be sure to close the right panels in the Adobe Acrobat windows by clicking on the arrows in the bars to the left of them, so that they don’t use up valuable space. Then click on the frames around the windows to resize them as needed. Window 1, containing the first version of the Reader, should allow only Japanese text to be visible. Window 2, containing the second version of the Reader, should allow romaji and English text to be visible, but it need not conceal the Japanese text completely. Window 3, containing the Kanji Catalogue, should be just wide enough to show its single column of text. Your screen should now look something like this:
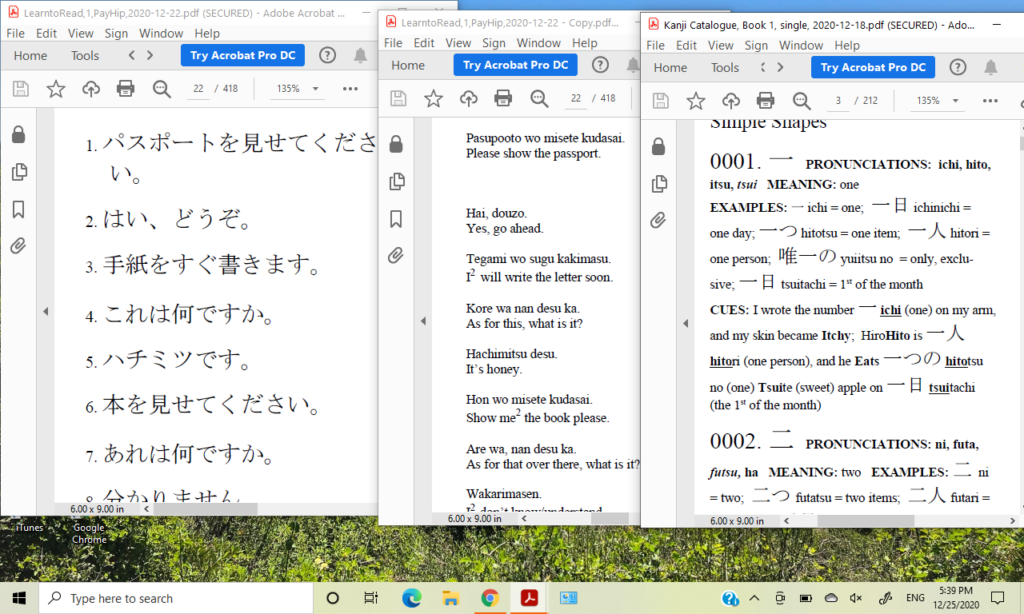
- Now start reading the Japanese text in Window 1. As you read, refer to the romaji and English text in Window 2 whenever necessary to ensure that you are reading the Japanese text correctly.
- When you need to look up a kanji character that you encounter in Window 1, highlight the kanji and copy it to the computer clipboard by using Control-c (holding down the Ctrl and “c” keys simultaneously). Now click inside the Kanji Catalogue window. If the Find box isn’t already open, use Control-f to open it. Click in the Find box. Then use the format “dot space kanji.” In other words, type a period, touch the space bar (the “space” may be optional, as mentioned above) and use Control-v to paste the kanji that you just copied into the Find box. Then press Enter, and you will see the entry for the kanji that you are seeking.
- If you need to look up a kanji character by using the kanji’s identifying number, type the 4-digit number in the Find box and follow it with a period. For example, if you want to look up kanji # 37, click in the Find box in the Kanji Catalogue window, and type 0037. (don’t forget to include the period). Then press Enter. This will ensure that you are taken to the beginning of that kanji’s entry.
- Please note that there is a glitch in Adobe Acrobat such that, occasionally, when you type a kanji’s identifying number followed by a period in the Find box, the program finds a large number of “matches,” which do not match what you have typed at all. If this happens, use the Backspace key in the Find box to remove the final period from your search term and press Enter. You will still likely see too many matches although not as many. Then type the period again after your search number, and the program will locate the correct entry.
- There is a second glitch in Adobe Acrobat that occurs after you have been searching documents for awhile. Apparently a document becomes corrupted, and the search function no longer works instantly. Instead, it works very slowly, forcing you to wait for about a minute as the program grinds away. If you close the corrupted file, the program will ask you if you want to save the changes you have made to it, even though you have not knowingly made any changes. If you reply “no” and then reopen the file, you may start to experience the slow search function again. Sometimes the only solution seems to be to close Adobe Acrobat completely, but that means that you will have to spend a lot of time reopening each window and adjusting its settings to reach the point where you stopped work. A better solution is to create a copy of the affected file, as described above, and to open the copy instead of the original file. That seems to correct the problem while keeping all of your other windows intact.
The following video demonstrates the use of these techniques to read Volume 2 of the book, but in this video only two windows are open, one for the Japanese Reader and the other for the Kanji Catalogue. After making the video, I realized that it would be better to use three or four windows, as described above.
Reading the Books on a Touchscreen Laptop Computer
A disadvantage of the techniques described above is that they require that one sit in front of a computer while engaged in Japanese reading practice. I wanted to find an alternative that was more comfortable and more flexible. For example, I wanted to be able practice reading on flights back and forth to Japan. So I purchased the equipment described below and made another video showing how reading practice on a touchscreen laptop might work.
Suggested Equipment
- HP Pavilion x360 laptop computer with a 14″ touchscreen display, or any similar touchscreen laptop. Originally, I had purchased an 11.6″ laptop for reading practice, but I found that the screen was too small, especially when I had 6 windows open at the same time (2 windows for the Japanese Reader, 2 for the Kanji Catalogue, 1 for the Kanji Pronunciation Index and 1 for the Glossary).
- Make sure that your laptop has at least 16 gB of RAM (random access memory). Initially mine had only 8 gB, and my computer was running slowly and sometimes fading to a black screen when I had multiple windows of Adobe Acrobat open. Fortunately I was able to upgrade my machine to 16 gB without too much trouble, and that solved the problem. Even so, it’s best to limit the number of open windows, and sometimes, when the computer seems to be running slowly, it’s best to reboot it.
- Stylus Active Pen for HP Pavilion x360, or any similar stylus pen.
Technique Modification for Stylus Pen
- Please be aware that there are two primary ways in which your pen or finger interacts with the screen when you are using a touchscreen computer: 1) to scroll the document up and down, or left and right, and 2) to select individual characters. Usually the computer can determine which kind of interaction you are attempting when you place your pen or finger on the screen, but sometimes it cannot. If you find yourself in that situation, in Adobe Acrobat, go to Edit, Preferences, General, Touch Mode, and change the Touch Mode option to “Auto-Detect.” Then click “OK” at the bottom of the screen.
- If the computer is still having difficulty determining whether you are trying to scroll or select, notice that Adobe Acrobat has a Hand button and a Pointer button near the top of the screen. Clicking on the Hand button allows you to scroll, and clicking on the Pointer button allows you to select characters. You can use keyboard shortcuts to move between the Hand and Pointer options. Go to Edit, Preferences, General, and select “Use Single-Key Accelerators to Access Tools.” Then click on “OK” at the bottom of the screen, and you will be able to touch the H key to allow scrolling and the V key to allow selecting. If you are still having difficulty, it may be time to change the battery in your stylus pen.
- When you need to look up a kanji character, use the following copy technique: highlight the kanji by placing the tip of the pen stylus in the middle of the space just to the right of the character and dragging the tip gently to the left. Now copy the kanji by using Control-c. Next click inside the Kanji Catalogue window. If the Find box isn’t already open, use Control-f to open it. Click in the Find box. Then use the format “dot kanji,” i.e., type a period and use Control-v to paste the kanji you just copied into the box. Then press Enter, and you will see the entry for the kanji that you are seeking.
- Note that I used the format “dot kanji” rather than “dot space kanji” in the previous paragraph, because I have found that the Adobe Acrobat DC program is able to locate kanji headings even though I do not use a space between the period and the kanji.
The following video demonstrates the use of the touchscreen laptop with a total of five windows open on the screen. In addition to the windows mentioned above, there is a window containing supplemental reading material from Satori Reader and a window containing the “Mnemonic Dictionary,” which was the precursor to the current Glossary. If you would like to be able to look up vocabulary terms quickly while you practice reading, you may open the PDF version of the Glossary in this fifth window.
Here are some suggestions that can allow you to stop using the “barrel button” key on your stylus pen, which is supposed to work like the right-click button on a mouse but can cause frustration. Posted 2025-12-28.
During my studies on a 14″ laptop touchscreen computer, I have often been frustrated by the top “barrel button” key that is located on my stylus pen, which I have had to use when selecting individual kanji characters for copying. That key is clunky and unreliable, at least on my equipment. If you would like to bid good-bye to this key, as I finally have, please look closely at the screenshot below. The window at the upper left in the screenshot contains the Japanese Reader for Chapter 36 of the second book in our series. If you look at the fourth line from the top of that window, you will see a black arrow near the middle of the window. This is the select tool which, when selected, allows you to select individual characters with your stylus pen or your fingertip.

Now suppose that I enlarge that upper-left window slightly by dragging its right wall to the right. Please look at the second screenshot below, where I have done so, and you will see that a blue hand tool has now magically appeared next to the arrow icon. This tool, when selected, allows you to use your stylus pen or fingertip to scroll through documents. These two tools only appear when Adobe Acrobat windows are enlarged to a certain size.

When an Adobe Acrobat window is wide enough, you can get access to either tool and thus change the function of your stylus pen (or your finger, for that matter), by simply touching the select tool or the hand tool. As a result, you will no longer need to use the clunky “barrel button” key located on your stylus pen.
The downside of this approach is that, when you widen Adobe Acrobat Reader windows, they use up a lot of scarce space on your small 14″ screen. There are ways to mitigate this downside: 1) you could reduce the size of the text in your windows to 100%, from 125%. 2) you could use a computer with a larger screen. In my case, I wanted to keep using the larger text size and the smaller laptop. So I chose option 3, a compromise that I describe below.
The compromise that worked for me was to eliminate one of the two windows that I had been using for the Japanese Reader. The reason that I had been using two windows was so that I could keep “questions” in the form of Japanese text in one window separate from “answers” (romaji and translations) in the other one. But I can just use one window containing the entire Reader document and cover up the “answers” that I don’t want to see with another window, which will do double duty (displaying one document and concealing part of another one). This versatile window will be the one that holds the Glossary, as shown in the screen shot below, where it’s the third window from the left.
Using this configuration, it’s easy to adjust the size of the Glossary window to cover “answers” in the Reader that you don’t want to see, and it’s easy to uncover those answers when needed, either by clicking on the Reader window or by moving the Glossary window.
If you adopt this compromise, I recommend that you include an Index window, as shown in the lower left of the above screenshot, and two windows containing copies of the Kanji Catalogue, as shown on the right. These three windows, plus the window containing the Glossary, should be set to Scroll by clicking on the hand tool. When you need to select an individual kanji character in any of these four windows, you can do so by briefly maximizing the size of the window and clicking on the select tool.
Note: sometimes the hand tool and the select tool can disappear from a document in Adobe Acrobat DC. In that case, it may be helpful to click on View at the top of the screen, then Show/Hide, Page Controls and Show Page Controls. Or sometimes you might need to click on View, then on Show/Hide, and then on Page Controls, after which you should uncheck Undock.
I wish you the best of luck with your Japanese reading practice.